Showing posts with label Scrambled Eggs. Show all posts

Saturday, June 28, 2014

037 - Silky Scrambled Eggs (Fast, Easy, CHEAP!)

Hello and happy weekend people!

How was your week? Mine was pretty awesome (snagged 21 Jump Street Blu Ray for 30% off? SCORE).

Anyway, since Ramadhan (fasting month) is right around the corner, I’m going to try to come up with more easy to whip up recipe to accommodate this holy month!

Recipe for today is very, VERY, straight forward. It is also very light tasting, perfect to match with any carbs you like. Rice, Bread, Pasta, all of it will work fine!

This is the SILKY SCRAMBLED EGGS!

I love eggs. Who doesn’t?? It is filled with protein, it is fulfilling, it is very flexible, and….IT IS CHEAP.

The recipe calls out for 3 ingredients only. How’s that for cost saving solution?

==============================

For 1 servings, you will need:


3 fresh eggs. Get organic if you can, the yolk tends to be bolder in flavor!
1 Tbsp of Butter. GREAT NEWS! Margarine can work in place of Butter too!!
Salt to taste

===============================

Ready? Here We Go!

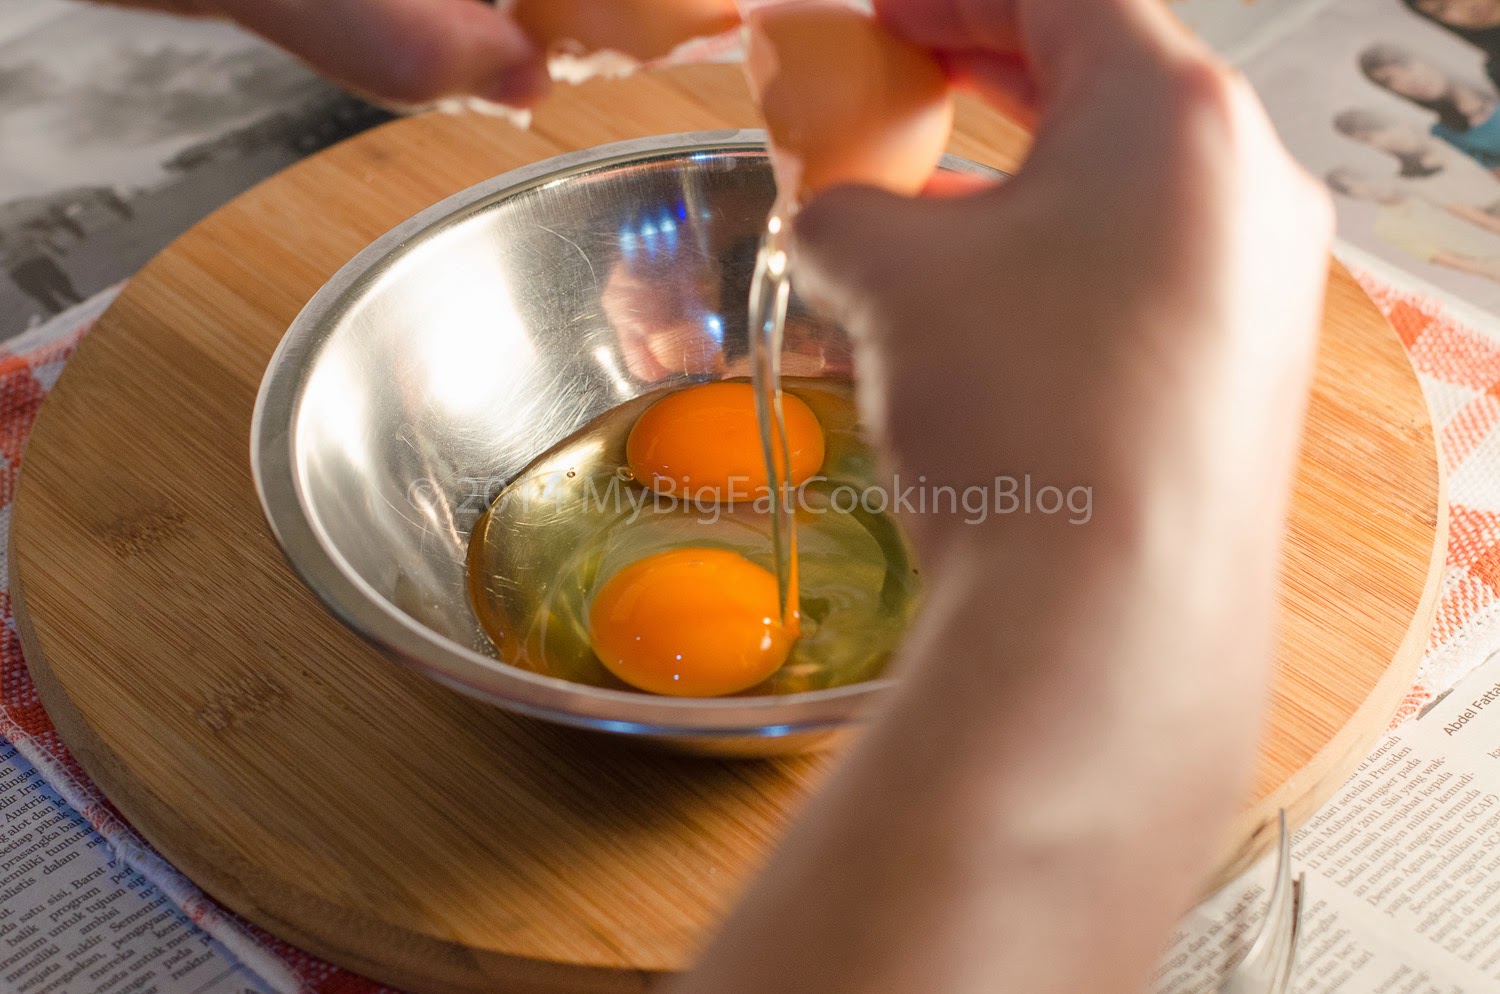
Step 1 – Get a bowl and crack all your eggs in. Get a fork and start whisking. Just mix for about 20 seconds, and set it aside.

Cracking eggs? Don't be afraid. Thump it with confidence against a hard surface, and BOOM. Off they go.
Don't overwhip! 

Step 2 – Get a non-stick pan, and pour 1 tablespoon of cooking oil. DON’T START THE STOVE YET.

GOT YA! I didn't pour the eggs just yet :p

Step 3 – Pour your eggs and butter in THEN you can start the stove. Use Medium-Low heat. I personally always start at Low, before gradually increasing to medium throughout the whole process. This way, the egg will become silky smooth. I actually first see this technique used by Gordon Ramsay. But his version is a bit different than mine. See the video and read on!

Eggy shower...
..with Butter for company

Step 4 – Rubber spatula is the only tool you will need for this. It won’t break the non-stick coating, and it doesn’t burn your hand! Constantly stir the egg non-stop to cook it. You can see the progress on the picture I took. After the first 30 seconds of stirring, add the Salt.  It took me around 4 minutes of constant wristwork to get this dish finished!

First stage
Salt goes in
See how it starts to curdle?
Keep going, nearly there
Bloody beautiful!
That is what you're aiming for!
Set it aside to avoid overcooking!

Step 5 – Serve!


Talk about quick and easy eh? I like to cook this for breakfast. I put it on top of my toast, and crack some black pepper over it, and yum yum yum. Love on my tummy people!

Here's some tips to remember by:
  1. Fresh eggs, fresh eggs, fresh eggs. Stale eggs? Get the f**k outta here!
  2. Improv? You can! mix some herbs and spices in the egg mix. Dried Parsley and Dill worked brilliantly well!


Give this recipe a go!


Peace

xx


Sunday, January 26, 2014

018 - Fish and Egg in a Bowl (a.k.a the DON)

Good morning everyone!

I sincerely hope the hangover from last night got through already. No? SUCK IT THEN! X))))

Anyway, I’m feeling like making a simple don before you go out for the day. You know, Don, that Japanese lunch in a bowl. It’s mostly fast and convenient. Tasted good too!

I loved the fact than you can prep 2/3 of the ingredient in this recipe beforehand. And by beforehand, I mean the night BEFORE! How amazing is that? Having a great lunch bowl ALREADY done even before you woke up the day after! (okay, I’m waaaaay too excited)

The Don will consist of 2 section: Rice and Toppings. No fuss in between. That’s, unless you want to add something else.

You will need:

As many rice as you want to fit inside the bowl. That’ll be around 1 cup or so on a small-medium size bowl.

For the fish floss:


150 grams of white fish, preferably Cod or Halibut (that’s ‘ikan sebelah’ for you Indonesians)
1 tbsp of Sea Salt for poaching
2 cups of water for poaching (feel free to adjust according to the size of your saucepan)
1 tbsp of Sake
1 tbsp of Mirin
1 tbsp of Sugar
2-3 drops of Red food coloring dissolved in a teaspoon of water (optional, but it made the dish looked pretty!)

To those reluctant to use alcohol in this recipe, you can cook without it just fine. The alcohol role in this recipe is to remove the fishiness.

For the scrambled eggs:


2 whole eggs
A pinch of salt

Ready? Here We Go

How to make Fish Floss

Step 1 – Clean your fish thoroughly, remove every bones if you haven’t ask your fishmonger to do so, wipe the surface with paper towel to remove excess moisture. Cut it down to small pieces to fit the saucepan.

Step 2 – Pour your water into the sauce pan, and dunk the sea salt in it. Let it boil.


Salt


Step 3 – Once boiling, throw your fish in and let cook for around 2 minutes on high heat, before lowering the heat down to low. Remove any foam on the surface while you cook. Once the fish can be flaked easily, time to remove it!


Foam starting to appear

Remove the foam!


Step 4 – Prepare a strainer to drain your fish. Once all visible moisture has gone down, lay the fish onto the paper towel to be squeezed out of every single bit of moisture left. It’s okay if you want to imagine your ex gf/bf while you’re squeezing, I’m not here to judge. HAHAHA LOL.


Strain


Squeeze

Ready for flaking

Step 5 – After squeezing, time for flaking! Now it’s time to get down and dirty. First thing first, WASH YOUR HANDS. No no, I don’t care if you said you washed it after you pee. If it came after touching the crotch, it won’t touch your food. Once your hands are clean, flake your fish (be careful, it’s still hot!), tear down every single bit you can lay your hands on. This process will help later on!


Step 6 – Prep your nonstick pan on low heat, then dunk your flaked fish in. I’m using chopsticks for 2 reasons: it won’t hurt my Teflon that much, plus, it looked bad ass. Stir your fish constantly with high speed. Then, pour your sake, mirin and sugar in. Stir vigorously until all moisture has left the fish. Word of advice: the pan might get too hot and brown the fish. If this happens, remove the pan from the heat and continue stirring before returning it back to the heat.


Sake

Mirin

Sugar

Stir more

Step 7 – Pour your food coloring in, stir even more vigorously to ensure even coloring on the fish. At this stage, you can use fork to break any stubborn lumps. After a minute or two, your fish floss is done!!


How to make the scrambled eggs

Step 1 – Break your eggs into the bowl, stir it with whatever tools you have lying around.


Step 2 – Prep your pan, pour a dash of oil. Just before dunking your eggs into the hot pan, give a dash of salt to taste.


Step 3 – Stir vigorously with chopsticks (or fork, FINE), to create a small and consistently sized eggs.


Step 4 – You’re finish once all liquids are gone!

Serve.


Man. MAN. That looked friggin’ cool. At some point, I thought I recreated a pokeball on a different color (Haha!)

Anyway, the fish floss could keep in the fridge inside a sterile jar for around 2-3 days. It’s microwavable, so it’s a nice thing to have for a quick bite.

Give this a go, and let me know how it turns out.


Peace

xx