Sunday, December 29, 2013

014 - Omelette! (Cause nothing says 'I Love You' better than this)

Since most of my previous posts are a bit pricey to replicate, I’m going to present you a fast and cheap recipe you can try right now. Really, like, NOW.

Before we go on, here’s a hint: this recipe is a staple in any breakfast buffet.

No clue yet? How about this; this dish is so versatile, it can be filled with tons of different fillings according to your liking.

Already have a guess? 

Yep. 

OMELETTE.

Fluffy, melt in your mouth, savory, ahhhhh, those are just a few words I can use to describe when you’re eating a perfectly cooked omelette.

Okay, enough bullshit, here’s everything you need to whip up that perfect omelette. Bear in mind, there’s no such thing as perfect omelette in this world. NO SUCH THING.

And if you ask why, the best answer is, “nobody likes something on a same level with everybody else”.

This recipe is the way i loved my omelette to be served. You can always easily adjust the recipe to your liking :) 

WAIT.

Oh yeah, I missed the ingredients. Here goes:


3 x Large eggs, room temperature.
2 tsp Full Cream milk. Wanna make it creamier? Substitute it with cooking Cream.
Splash of Oil for cooking

THAT'S IT. 

So at this point, you’ll probably thinking,” are you stupid? Where the hell are my fillings? Where's the seasonings??”

Like I said before, the fillings and seasonings are yours to choose. The sky is the limit. Go nuts.

….but if you insist, I’m going with cheese and sauteed button mushroom for now. No salt and pepper because i like it cheesy.

Ready? Here We Go!

Step 1 – Heat your pan, medium high heat. Use a nonstick pan. Oil it lightly. Oh, and i'm using Spatula for this.


Step 2 – Crack your eggs, add your milk, whip it fast and hard. Yeah, mehehehehhehehe


Step 3 – Prep your filling. Please make sure your fillings are either at room temperature, or already pre-cooked. Mushrooms tend to taste like dirt when eaten raw, so a quick sauté on a pan is a MUST. I lightly saute my mushroom with a bit of salt, chili flakes, and onion powder.

Step 4 – This is optional, but if you want to season your omelette, just before putting the egg into the pan, put the salt and pepper in. If you put salt right when you whip the eggs, the salt will separate the water from the egg whites, practically, ruining your omelette.

Step 5 – Pour your eggs into the pan, and use spatula/fork  to swirl it around quickly before it sets. This motion will create a fluffy interior. Do these until there are little to no more liquid remains. This process will be very quick, approximately 1 minute.


Step 6 – Put your filling in, and get ready to get technical (kidding, it’s a lot of trial and error). The way to fold the omelette is to tilt your pan, and gently tapping the handle to bring the omelette to the edge of the pan, blanketing the surface with the bottom part.


CHEESE

MUSHROOM

Flippy-flippy

Almost there..

NAILED IT!

Step 7 – PLATE


Fast, cheap, simple. 


Give it a try.

Peace


xx

Sunday, December 22, 2013

013 - Chocolate Nutella Mousse

Yes yes yes, a lot of you over on Twitter and Path had been requesting dessert recipe for quite a while. Fret not, I’m going to fill your hunger for it. All hail the almighty

Chocolate

Nutella

Mousse.

This fucker right here will get any job done. No Joke!

This recipe is fast (under an hour cooking, that’s fast right?), it’s creamy, it’s sweet, it’s chocolatey (I’m not even sure if this is a right word tbh lol), and it HITS. THE. SPOT. Let’s cut the crap and go straight to the good stuff!

Here’s everything you need:


175 ml of Whipping Cream
150 grams of good quality chocolate. Always look for the ones containing ‘Cocoa Mass’ and ‘Cocoa Butter’ in it. This is a good sign that it is made with REAL chocolate, not with some cheap ass hydrogenated palm/vegetable oil.
6 tbsp of warm, full cream milk.
20 grams of unsalted butter

And here’s the one ingredient that will give this mousse that secret kick. That cream of the crop. That cherry on the top:

NUTELLA. Not too much, 1 tbsp will suffice!

Oh, you will also need either a whisk or an electric Mixer.

So, have you got everything prepped?

Ready? Here We Go!

Step 1 – Ensure your whipping cream is fridge cold, so does your bowl. But since I’m too lazy, it’s only the cream that is as cold as the Alaskan winter. Measure it, and put it into the bowl.


Step 2 – Whisk the whipping cream with your preferred utensil. I usually use whisk, but since that will gave your wrist the worst ache ever afterwards, I’m going with the mixer. You’ll need to whisk it until it reaches the stage of ‘firm peak’. That, is when you pick up the cream, it stays still, but soft enough to be still pliable. NEVER whisk it beyond that point. You will only get a lumpy, inedible, ugly looking cream.

Still Liquid.

BEGIN

Starting to take shape

ah, it's getting fatter by the minute

DONE

Stiff Peaks

Step 3 – Once you finished whisking, put the cream into the fridge to wait.

Step 4 – Fill a small pot and fill it with water. Once you done that, find a bowl that will fit on top of the pot. We will melt the chocolate slowly over the boiling water WITHOUT letting the bowl touch the water at all. Put your chocolate and butter together, and let it melt slowly for about 6-10 minutes. This technique is called au bain-marie, or, in simple English, water bath.


Chocolate and Butter in


Step 5 – Once all the chocolate and butter melted and looked like a lump, put your warm milk, 1 tbsp at a time. This will ensure a smooth consistency, or else, if you fuck it up, it will be much harder to fix.

Lumpy mess

Dairy to the rescue!


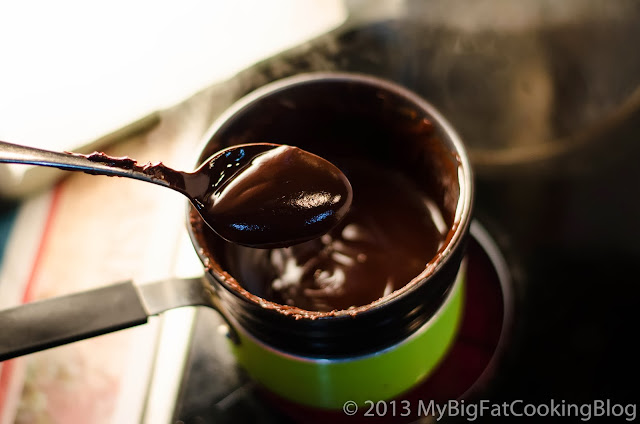
Step 6 – After all the mix had been mixed, transfer the chocolate to a large plastic bowl, and stir constantly with a spatula to bring it to room temperature. I use plastic because it doesn’t contain heat, thus, making cooling process much faster.


Still hot

Incorporating cold air


Ready for the mix

Step 7 – Once the chocolate has cooled, it’s time to mix it with the cream. DON'T FORGET YOUR NUTELLA!. We will use a folding motion to ensure the mix get blended smoothly. Remember: Chocolate mousse GOTTA be smooth.


The HOLY GRAIL

Starting

Still folding

Starting to take shape!

Almost there!

FINISHED. BLOODY 'ELL


Step 8 – Transfer the mix to your preferred serving glass,  and put in in the fridge for at least 3-4 hour.

Step 9 – INDULGE


Well I gotta tell you

*gulped a spoonful*

This mousse is

*gulped another spoonful*

FUCKIN’ DELICIOUS.

*munch munch munch*


Give it a try!

Peace


xx

Sunday, December 15, 2013

012 - Mung Bean Porridge (That's 'Bubur Kacang Ijo' for you Indonesians)

This recipe here is what I call a real comfort food. Come on, don’t tell me you never had this for munchies before? Mung Bean Porridge (which goes by the ever so awesome Indonesian name: bubur kacang ijo) goes well at (almost) anytime of the day.

Just woke up and feeling hungry? Mung Bean Porridge
Stayed up all night and got the munchies? Mung Bean Porridge
Got sick and needed some proper food? Mung Bean Porridge.

See? This shit is proper awesome. And it’s dead easy to make too! Here’s everything you need:


200 grams of raw Mung beans
150-200 grams of Palm Sugar cube. It’s okay to substitute with brown sugar if you can’t find Palm Sugar.
4-5 Cups of water. The amount will depends on the cooking state. Read on!
1-2 inch of ginger
1-2 pandan leaves.

Optional: 

Splash of coconut milk. If you can’t stomach coconut milk, it’s okay to substitute with fresh milk.

This recipe will probably cost you 20-30 thousand rupiah max, and it should feed 4-6 people!


Ready? Here We Go!

Step 1 – Soak the beans in warm water for at least 1-2 hour. This will help the beans to softened up, shortening the cooking time later on. But…..since I’m impatient, half an hour do good for me. This proven to be a BAD decision. Read on. Oh, and if you see any beans floating on the water, throw it away, those are no good.


If it floats, no no.

Step 2 – Smash your ginger. Bash it. Yes. Pour all of your emotion to it.


Step 3 – Pour your water, mung bean, ginger, and Pandan leaves to a pot, set the heat on high. This process will take around 30 minutes – 1 hour depending on the heat source. Mine took around 45 minutes BECAUSE i only gave the beans half an hour to soak. It’s too long? Fret not, IT’S WORTH IT


Step 4 – You can check back every now and then. The cue here is when you see much of the beans started to crack. When that happens, put in your salt and brown sugar and. Just make sure you cut the sugar into small pieces beforehand, so it can blend in easily. Nobody likes lump in their porridge right?


THE CUE


Step 5 – When it smells like little piece of heaven, it’s time to serve!


And i present to you....


The glorious bubur kacang ijo. Hell yes. This one is topped with coconut milk and pandan infused whipped cream. It. Tasted. GOOD.

Give it a try folks!

Peace


xx