Showing posts with label Food. Show all posts

Saturday, June 20, 2015

072 - Roti John (BREAKFAST ON STEROIDS!)

So, Roti John is a breakfast food popular in Singapore and Malaysia. Legend has it, the recipe was conceived when a Caucasian male (just like Indonesians who called them ‘Bule’, locals there calls them ‘John) was requesting a meat sandwich for breakfast. Hah, if I were the locals, I’d serve him some Egg sandwiched between 2 white breads. The Locals? Nah, they’re going ape nuts by mixing meat, onion, and eggs before smashing a baguette on top to finish it off.

Results?

F*CKING. TASTY.

So here it is, ROTI JOHN.

For 1 Serving, you will need;

- Ground Meat – 100 Grams – Don’t go cheap, get a good quality meat for REAL treat.
- Eggs – 2 Whole
- Onion – ½ piece – Diced
- Baguette / Hot Dog Bun – 1 Piece – Sliced in the middle

Meat Seasonings
- Paprika Powder – ½ tsp
- Salt – ¼ tsp
- Black pepper – ½ tsp
- Garlic Powder – ¼ tsp
- Curry Powder – ½ tsp

Ready? Here We Go!

Step 1 – Heat oil in a non-stick pan on high heat. Stir fry meat, moving constantly. Add all the meat seasonings one by one while stirring. When meat turns brown, about 2 minutes, it’s done. Set aside to cool.

Hot Oil

Stir the meat quickly. This will help to prevent it from sticking

Add all the seasonings

Mix!

Lovely!

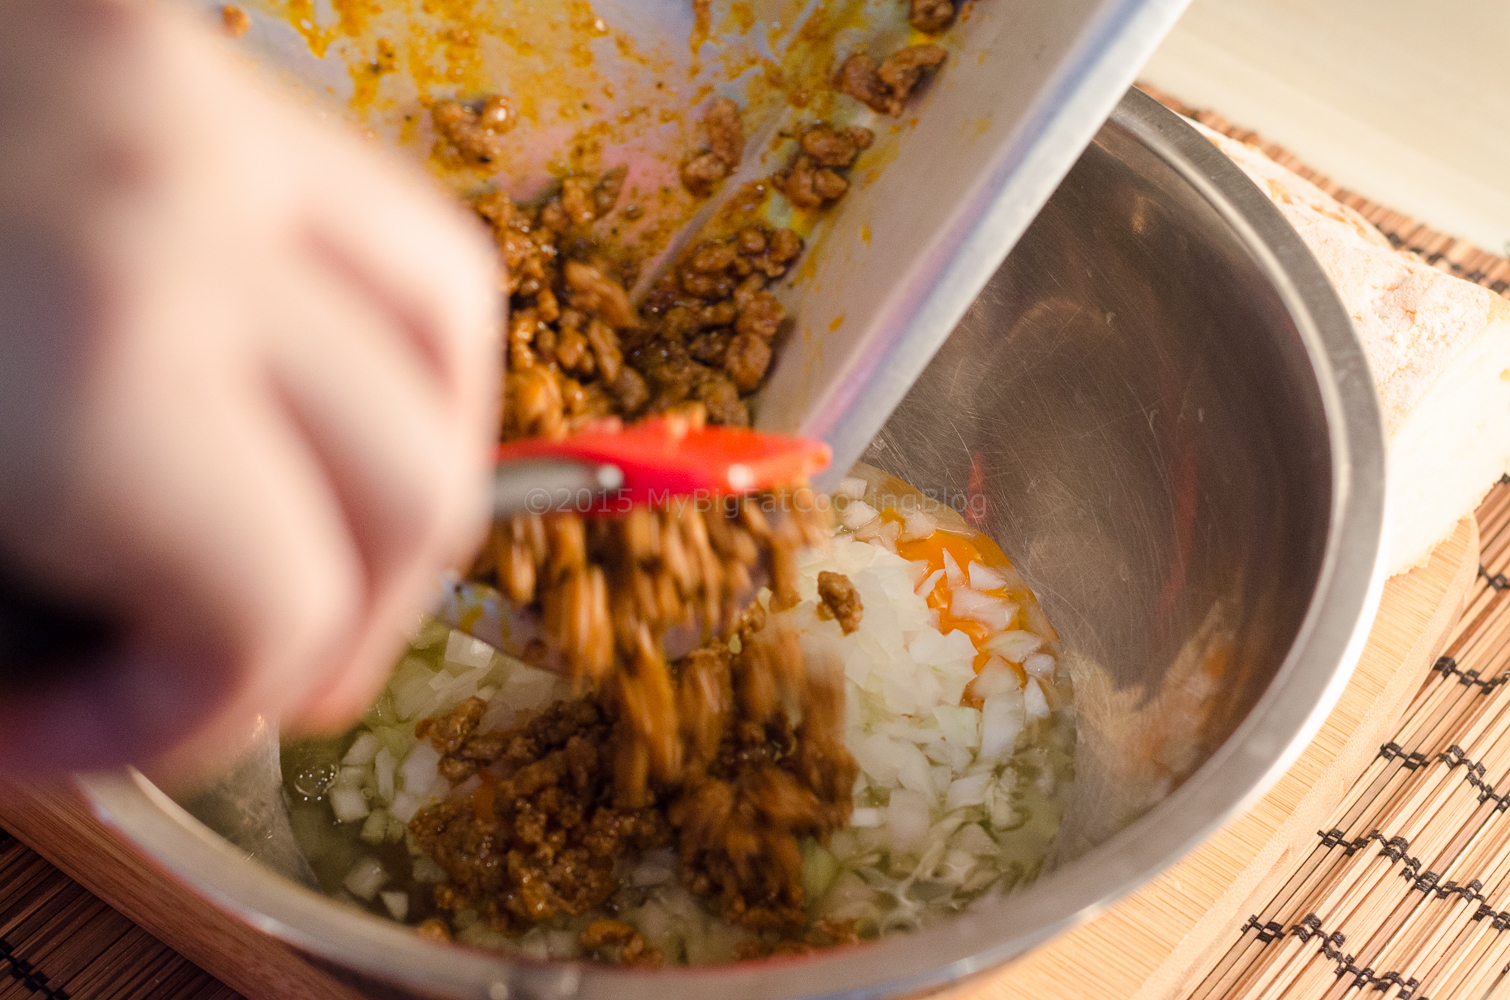
Step 2 – Crack the eggs into a bowl; add the diced onion and the meat. Give a nice mix with a fork. Set aside while you heat a small amount of oil in the pan.
Eggs

Onion

Meat

A lump of ugly mess. But it is going to be tasty!

Step 3 – Pour the mixture into the pan, just enough that it covers ¾ of the pan. Quickly put the bread in, and give it a nice press so the mixture will stick to it. Cook for 3 minutes on medium heat.

The mixture is looking lovely!

Press it down!

Step 4 – Once you see the edges started to brown, give the sandwich a flip, and toast the other side for another 2 minutes, or until it reaches your liking.
Flipped!
Step 5 – When finished, sliced into portions, give it a shower of condiments and…

Step 6 – SERVE!


And that's how you make, Roti John.

xx


Sunday, March 29, 2015

068 - Coffee Jelly

Japanese people are creative with their dessert. Endless array of sweets awaits you if you ever come to visit Japan someday. 
One of my favorite is this COFFEE JELLY. 

It is basically coffee mixed with sugar and agar added. Add some evaporated milk, and, BOOM. Delicious.

For 6 portion, you will need;

·         Water – 600 ml
·         Agar Agar – 1 Packet (Approximately 15 grams)
·         Coffee – 2,5 Tbsp. Instant coffee do just fine, but freshly ground coffee is even better.
·         Sugar – 2,5 Tbsp. Brown sugar, white sugar, whatever sugar worked just fine.
·         Evaporated Milk – 1 Can

Ready? Here We Go!

Step 1 – Pour the water into a large pot, set the heat to high. Let It come to a boil

Step 2 – Once boiling, add the Agar and quickly stir to combine. After that, add the sugar. Again, stir to combine. Let it boil for another 1 minute.
Agar


Sugar


Step 3 – Remove the pot from the heat, then add the Coffee. Give it a nice stir.


Step 4 – Transfer the mix to a mold of your choice; let it cool in room temperature for 20 minutes before putting it into the fridge for an additional 2 hours. After 2 hours, take it out, cut it into small squares and..

Tip: remove the air bubbles for great finish!


Step 5 - SERVE!


To make sure you get the best of both worlds, make sure both the Jelly and the Milk is cold prior to serving.

Give this recipe a try!

Cheers

xx

Saturday, May 3, 2014

031 - CHICKEN KATSU (So easy, you'll be amazed)

Comfort food time! You might recognize this recipe from one of the most famous fast food chain in Indonesia. It is crunchy, savory, and goes perfectly well with cabbage and piping hot white rice. CHICKEN KATSU, that’s what it is.

I consider this dish as the perfect introductory dish to Japanese cooking. It only uses a small amount of ingredient, it tasted awesome, and it cooks hella quick.

Like all dishes, the key to nailing the perfect katsu lies in the ingredients. Get a fresh chicken breast, and always use the Panko. Panko is Japanese breadcrumbs. It’s not expensive (around IDR 12.000/US$ 1.00 per bag), and it is now readily available in most supermarkets in Indonesia.

For 1 servings, you will need:


1 large, boneless Chicken Breast. Buying a pair of boobs, oops, breast in supermarket is fun. Chicken Breast are always sold in pairs, left side and right side of the breast. This recipe only needs one half of it.

Enough oil for frying

For the breading:

100 grams Panko Breadcrumbs.

100 grams All Purpose Flour

1 Egg

1 tsp of Salt

(Optional) ½ tsp of MSG. Yes, this might scare some people, but MSG is the Umami key. IT MAKES THE DIFFERENCE!

Ready? Here We Go!

Step 1 – Clean your chicken properly, remove any excess fat and small bones left behind. Wipe it dry with paper towel, and make sure it’s in room temperature. Then use a heavy object (i use my meat mallet) to tenderize the chicken. Don't skip this part, ever.


Dry it out.
And a quick punches.

Step 2 – Mix your all-purpose flour, salt, and MSG (if you’re going with the optional), give it a stir, set it aside. Oh, and i shit you not, the MSG DOES MADE A DIFFERENCE.

Flour
Salt
MSG BITCHEZ
Stir, Stir, STIR.

Step 3 – Crack the egg, give it a nice mix.

Step 4 – Heat your oil, use medium heat. Set a coating line of flour-egg-panko.


Step 5 – After the oil gets hot enough, dip your chicken to the flour first. Shake off the excess, and dip it in the egg. After that, it all goes down to the Panko before the nice hot bath in the oil.


Step 6 – Let the chicken sit untouched for around 2-3 minutes. Once you see the edges turn brown, give it a flip. Remember, don’t hack the process with higher heat, you will end up with burnt outside and raw inside. No no. Cook the other side for an additional 2 minutes. Once it’s all cooked up, take it out of the oil and let it rest on paper towel to drain off excess oil.

The answers is in the edges, Son.
Bloody lovely!

Step 7 – Serve!


Garnish with a side of thinly sliced cabbage, and voila, your first step into Japanese cooking made easy.

It’s crunchy, it’s savory, it’s satisfying.

Give this a go, your loved ones will go crazy over it!

Peace

xx


Sunday, March 9, 2014

023 - Sprite Mayonnaise Shrimp (Because WHY NOT?)

First of all, I would like to apologize for lack of update last week.

I was out traveling to Singapore to catch my favorite band Taking Back Sunday LIVE! The experience was any less than exhilarating! Not only did I get to sang my favorite song along, I also got to meet Adam Lazzara personally (totally by accident, I tell you), and the whole band few moments afterwards! 

I told them how disappointed I am about that proposed Jakarta show in 2010 that got cancelled, and how lucky I am to be able to see them live that day. If you love music, please please please, check out Taking Back Sunday newest album (it’s coming out on March 18th), here’s a video of their latest single, ‘Flicker, Fade’


Anyway, Singapore has the biggest Kinokuniya bookstore in all of SE Asia. And I didn’t miss my chance to scoop up some new readings. I read through some interesting cooking books, and got several quirky ideas for a new recipe.

This week recipe is a crowd favorite at Chinese Restaurant here in Jakarta. But as always, this is my take on the recipe. Please give a warm welcome to…..

SPRITE BATTERED SHRIMP WITH MAYONNAISE!

This might just be the craziest idea I’ve put up in a while, but why not??

Here’s everything you need, be noted, not everything is pictured here:


10 medium sized Shrimp. Always get your shrimps fresh. Deshell them, make a split on the back and remove the black vein.
Enough flour for dusting
Enough cooking oil for frying

For the Batter:
1 cup all-purpose flour
3/4 cup ice cold Sprite. If you don’t want to use Sprite, switch it to sparkling soda water instead. The cold and the fizz will help the batter to crisp up nicely!
1 egg, beaten
1 tsp of Garlic powder
Pinch of Salt

For the sauce:
4 tbsp of Mayonnaise. I like Japanese mayo the best, but I currently have Korean Mayonnaise, and it’s not that much of a difference, so I’m using that.
4 tbsp of sweet condensed milk. YES, I know what you’re thinking. How in the world this sweet and sticky concoction can help the recipe? Well, they just do.
2 tsp of Lemon Juice. Acid will cut the overwhelming taste, trust me.

So, ready to shake off some bad memories about your ex and whip up a killer dish?

I say it again.

Ready? Here We Go

Step 1 – Clean your shrimp and pat it dry. Set aside to let it come to room temperature
Lay the shrimp evenly
Gently squeeze
Dried and ready to go
Step 2 – Prepare the batter. Get a bowl; pour your flour, garlic powder, beaten eggs. Mix it a bit, and pour your Sprite adding little by little. This will help prevent lumps. Oh yes, the Sprite HAS to be ice cold! Set the batter aside. Oh, and if by any chance the batter seems too thin, add a bit of flour to thicken it, or, cornstarch for that crispy bite!

Flour

Beaten Egg
Garlic Powder
Pinch of Salt
SPRITE!
Mix

Step 3 – Heat your cooking oil on medium high heat, and assemble a line of flour-batter-oil. The shrimp will go the flour for dusting first, or else the batter wouldn’t stick. Then it goes to the batter, and then, BOOM, hot oil. Fry for 30 seconds on each sides until lightly golden. Don’t overcook it! shrimp will taste like rubber if left for a long time! Set them aside on paper towel to drain excess oil.

Dusting with the flour
Dunk in the batter
Hot Oil
Fry 'em several at a time, i'm going with 3
After 30 seconds, flip
Golden Brown perfection!

Step 4 – Mix together the mayonnaise, lemon juice and the condensed milk, and throw the shrimps in for a bathe of sticky-sweet-savory concoction!

Condensed Milk
Mayonnaise
Lemon Juice
Finished Product
Pour
Drizzle

Step 5 – Serve


Ah yesh!!! This dish will definitely steal the attention! Eat this with a serving of heartwarming hot white rice, with a side of your favorite vegetables!

Give this a try, and let me know the results!

Peace

xx